Fitting and Applying a Design into a Printing Template Using Adobe Illustrator ( Case example)
Step 1 :
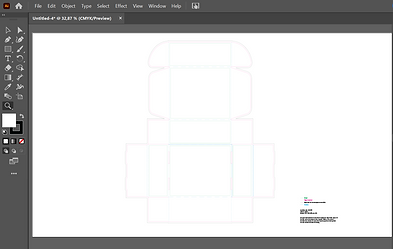
Understanding the Printing Template
Before starting your design work, it's crucial to understand the structure of the printing template. A typical template includes:
-
Trim Line: The final cut line where the product will be trimmed after printing.
-
Bleed Area: An extra margin (usually 3-5 mm) beyond the trim line that ensures no white edges appear after trimming.
-
Safe Zone: The area inside the trim line where essential elements (text, logos) should be placed to avoid being cut off.

Step 3 :
Fitting Your Design to the Template
-
Extend Backgrounds to the Bleed Area:
-
Ensure that all background elements, such as colors or images, extend beyond the trim line into the bleed area. This prevents any unwanted white edges after trimming.
-
-
Align Critical Elements in the Safe Zone:
-
Place important design elements, such as text, logos, and critical graphics, within the safe zone. This ensures they won’t be cut off during the trimming process.
-
-
Adjust the Design to Fit the Template:
-
Use Illustrator’s alignment and distribution tools to ensure your design fits precisely within the template.
-
Scale and adjust your graphics as necessary, making sure they fill the space appropriately without distorting the design.
-
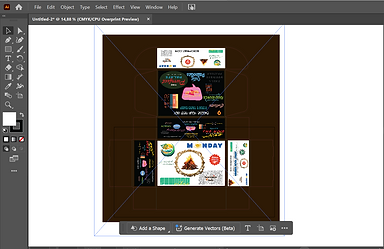
Step 5 :
Review and Proof
Before sending your file to print, review a proof to catch any errors or adjustments that may be needed. Confirm that all elements align perfectly with the template and that the design is ready for high-quality printing.

Step 2 :
Preparing Your Design
-
Set Up Your Document:
-
Open Adobe Illustrator and create a new document using the dimensions specified in the printing template.
-
Ensure your color mode is set to CMYK for accurate color reproduction in print.
-
-
Import the Printing Template:
-
Place the printing template into your Illustrator document (File > Place).
-
Lock the template layer to prevent accidental modifications (Layer > Lock).
-
Step 4 :
Finalizing the Design
-
Check for Overlaps and Misalignments:
-
Zoom in and carefully review the design for any overlaps, misalignments, or elements that may have inadvertently strayed outside the safe zone.
-
-
Outline Text and Embed Images:
-
Convert all text to outlines (Type > Create Outlines) to prevent font issues during printing.
-
Embed any linked images into the file to ensure they are included in the final print-ready file.
-
-
Save a Print-Ready File:
-
Save your design in print-ready format (File > Save As > PDF, AI, EPS, CDR, or high-resolution image 300 DPI ).
-
Ensure the file includes bleed settings and is set to the correct color mode (CMYK).
-
